Had the customer asked me about the feasibility of putting a cubby grid in a non-rectangular space, I would have advised against it. But he didn’t ask. He just designed and bought, approved the drawing, and after his order arrived, had been assembled assembled, and put in the drawer, he took the following image and sent it to me. That was the first time I knew about the curved drawer front.
No, it’s not perfect, but he says it works for him and he’s happy. Notice he filled in the gap in the front with glasses cases.
I received the following question from a customer:
We have ordered more movable dividers than we think we will use, just to have a few extra’s, so if you normally choose the location of the slots to allow even spacing, then for all movable dividers that are oriented from front-to back (the ones that are 7-5/8” and 10-1/2” in both drawers) please assume one less divider per section when determining that spacing. This will result in three 3-1/4” spaces across those sections of the first drawer (assuming 1/8” thick dividers), and five 3.45” spaces across those sections of the second drawer. If you don’t normally base the slot locations of the number of dividers, that’s fine. We’re not asking for something special. However, if the slot locations do normally take the number of dividers into account, then please make those determinations as described above.
Here is my response:
Good question. I understand about ordering extra dividers, but, no, we do not adjust the spacing of the slots based on the quantity of dividers.
Not long ago, a satisfied-but-less-than-thrilled knife block customer sent me a picture of his finished project.
Though the knife block is functional, some cooks might not like the levitating knife handle of the cleaver shown in this photo above. Others might love it. It would be easy to grab for a quick chop, chop, chop…
For handle-heavy knives, you might end up with a situation like the above. The handle of this butcher knife is resting on the block while the tip of the knife is exposed. Assuming the tip is towards to back of the drawer, this wouldn’t be cause for concern, but if the block was being stored in another orientation, that could be problematic.
Just understand that tall-bladed and long, handle-heavy knives might “sit” differently that expected in the knife block.
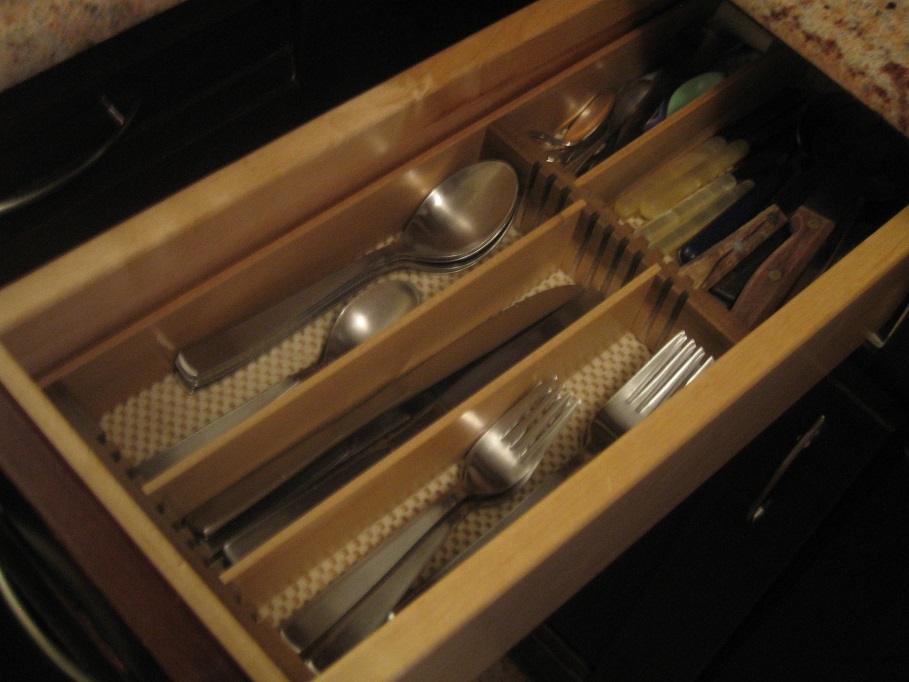
I recently received the following images from a happy customer who ordered two custom drawer inserts, and they sit in the same drawer, one on top of the other. The top insert fills the width but not the depth of the drawer. She can move the top layer to the front or back of the drawer to access the items underneath. Clever. And it looks great!
This is a great solution for tall drawers and for tiny kitchens where some drawers need to pull double duty.
If you have a greater than 31″-wide drawer, you won’t be able to plan a cubby grid using our design wizard, as it won’t accept drawer dimensions greater than 31. This limitation comes from our laser cutter.
But you can contact us, and we can design a cubby grid for your large drawer that will use “interlacing” to get around the size limitation.
The red dots on the drawing below indicate breaks in the horizontal (side-to-side oriented) walls so that none of the walls will be longer than 31″.
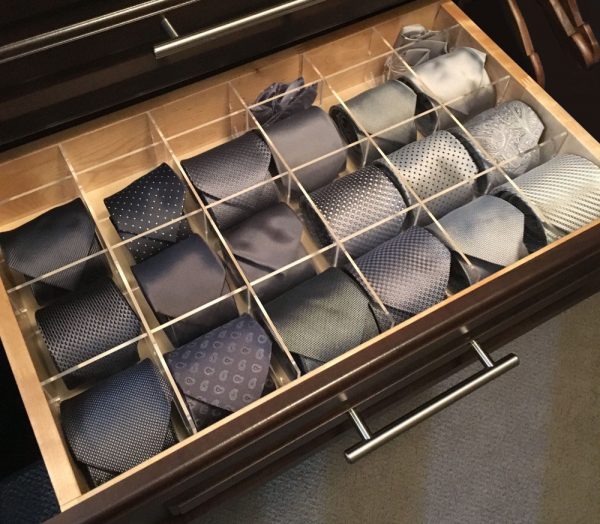
Good question. There would be if all ties were created equally, but they’re not. Remember the skinny neckties of the ’80s? Perhaps they were in backlash to the wide ties of the ’70s. Today, ties tend to be mostly somewhere in between, but you never know when a new width will become the next big trend. What to do? Here are some thoughts on how to size your tie cubbies.
If you want your cubby grid to be evenly spaced, and you want your ties to be placed broad-side up in drawer, as seen above, you need to measure the width of your widest tie and plan the cubby width accordingly. The above are 3.5″ x 3.5″
A 3 x 3″ cubby will comfortably accommodate the typical tie, if not in the broad-side up position, then in the edge-side up position so that the coil is visible, like a cinnamon roll’s swirl, as in the photo below. (Thanks to Flickr’s WernerKrause for the use of this image.)
Don’t forget that cubbies don’t have to be evenly spaced. You could have a couple columns for skinny and bow ties and one for wide ones, as shown in the layout below. On page four of the design wizard, just drag the wall to suit your preference.
On page four of the design wizard, just drag the walls to suit your preference.
The divider looks great. The only problem is my drawer does not come out and it just won’t fit. We are talking about half an inch…So upset. What would you recommend? Is it easy for me to remove the nails from one side and trim it a bit?
This was my response:
Don’t worry. We’ve never met a drawer that could not be removed from the cabinet. Sometimes it seems impossible, but you probably have some modern drawer slides with a safety feature to keep the drawer from toppling out on a curious toddler. There’s probably a very simple mechanism that needs to be pressed or slid to one side to allow you to completely remove the drawer.
I recommend you do a Google image search to find out what kind of drawer slides you have, and then to a search at YouTube for how to remove a drawer with that type of slide.
Let me know how it goes!
The customer was able to figure out how to remove his drawer and successfully put his insert in. No tools required.
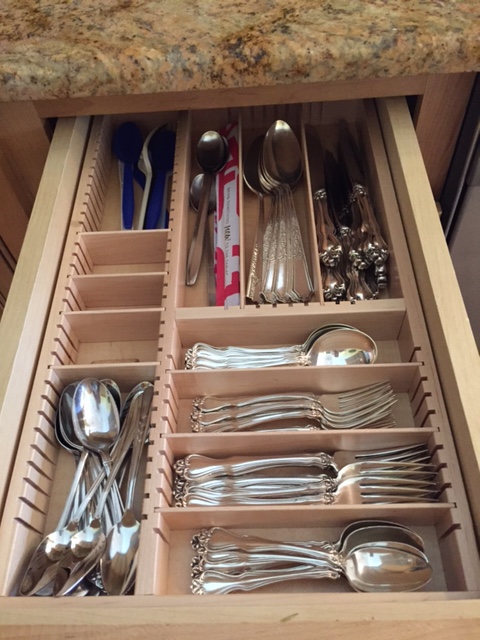
Flatware tends to get relegated to the narrowest of kitchen drawers — and for good reason! Few kitchen tools are as slim as silverware. Though they’re often small in size, a flatware drawer is typically the most frequently opened drawer in the entire kitchen. For that reason alone it deserves to be well-organized and to look great!
Here are some photos of beautiful, narrow kitchen drawer, worthy of a smile every time they’re opened.
Another title for this post could have been “A match made in heaven — your narrow drawer and the Brandi template.” But that sounds too dramatic and rather ridiculous. So we’ll stick with the boring-but-practical-sounding title.
The narrow kitchen drawer tends to be used for flatware, and there may be no better candidate for a custom drawer insert. Why? Because every bit of space counts in a narrow drawer!
By far, our most popular template for narrow kitchen drawer is the Brandi template…and for good reason. When all the dividers in an insert are oriented front-to-back, we can use thinner material for the side walls of the insert, leaving more usable space across the width of the drawer than with other templates.
You might be wondering, “Why can’t you always use thinner material?” Well, the slots require that we use thicker material. If dividers are in the side-to-side orientation, we need thicker walls to make sure there’s room for slots and for enough material left over for a structurally sound product.
If having thinner material is important for your drawer situation, let us know, and we’ll do what we can do accommodate.
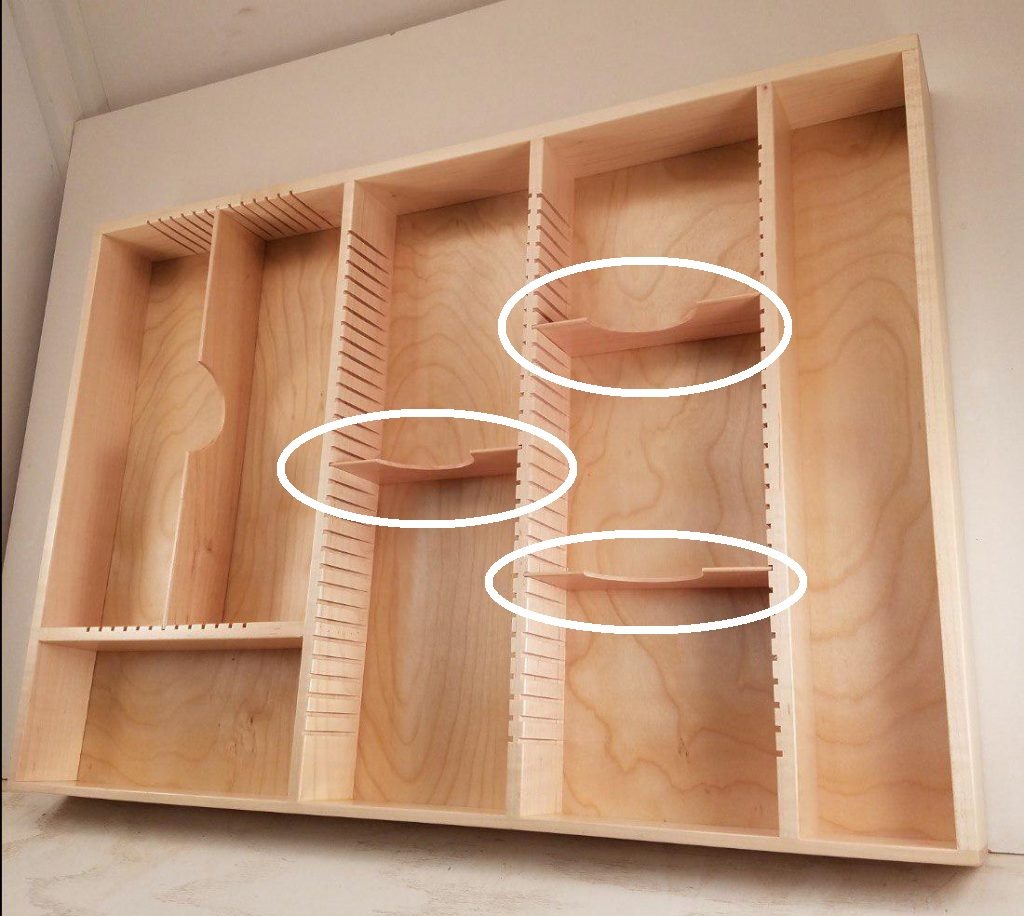
Scooped dividers are handy — even essential — in some situations. In others, they’re just a preference. There’s one situation, though, where having scooped dividers is not advised — when they’re oriented perpendicularly to the utensils they separate. Not only are they unnecessary in those situations, they’re a liability. Let me explain…
In general, scooped dividers should be oriented in same direction as the utensils, as in the scooped divider (not circled) on the left in the image above.
The remaining circled scooped dividers in the photo above are oriented perpendicularly to the utensils that will be in those sections and will be subject to the impact of sliding utensils on the smallest, most vulnerable area of the dividers, the material just below the cutout, as the drawer is opened and closed.
In such cases, we insist that you opt for regular dividers. Not only will you save money, you’ll get a more durable product.